ReSharper Series - Part 0: Installation

Welcome to the 0. part of my ReSharper series - almost at the "real" ReSharper content now, but we just need to get the Resharper installation out of the way. It's not really that hard either.
ReSharper Installation
This series is based on ReSharper 4.1 - as this is the newest version. You can download it directly from here. Once you get past the installation, just fire up Visual Studio and it should present you with options to use either Visual Studio or IntelliJ bindings. I've gone with the IntelliJ bindings for my setup, so this is what this series is going to be based on. I am using the Visual Studio bindings, and will provide information for both keyboard layouts in this series.
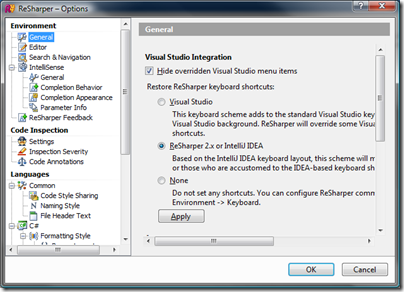
If you already installed ReSharper earlier and want to switch to either of the bindings, you can do so in the ReSharper Options in the General section:
The first time you use some of the shortcut keys that clash with Visual Studios bindings, you will get a dialog like the one below:
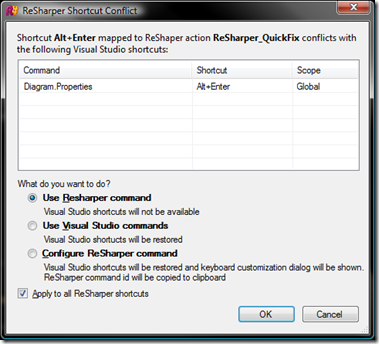
I usually just check "Apply to all ReSharper shortcuts". Haven't had a problem with it yet. Then you should be set for starting up with ReSharper.
Additional Suggestions
Other than installing ReSharper, I've found it helpful to print the cheatsheet from the JetBrains ReSharper documentation page. It can be found here.
I also recommend picking up Roy Osherove's Keyboard Jedi - pressing Ctrl+Alt+Shift+F12 will disable the mouse in the application that currently has focus. I've found this to be a very healthy technique when figuring out how much you really use your mouse - and force you to look for those keyboard shortcuts. It sounds silly, but it can really change the way to work when the mouse is just not available. Just enable it one hour each day.